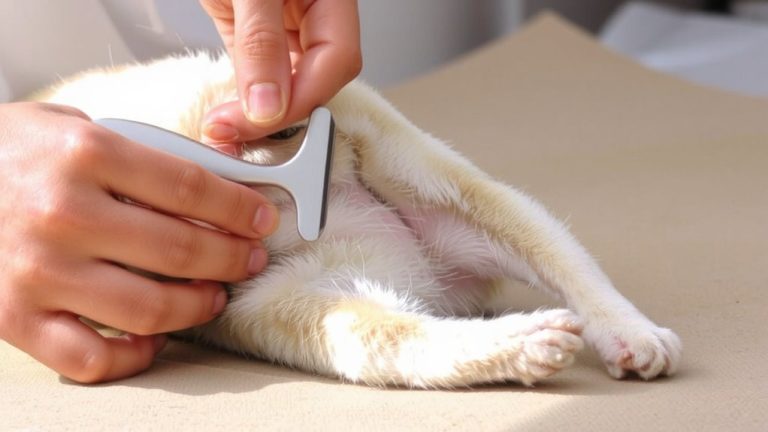
How to Use a Nail File to Smooth Edges After Trimming a Dog’s Nails
After trimming your dog’s nails, use a heavy-gauge metal file made for pets to smooth sharp edges. File each nail with 10–15 one-direction strokes until the tip is flush with the paw pad. For light nails, stop 2 mm before the pink quick; with black nails, watch for a grayish center. Use short bursts to prevent heat buildup, and keep styptic powder handy-there’s more to mastering the routine safely and confidently.
We are supported by our audience. When you purchase through links on our site, we may earn an affiliate commission, at no extra cost for you. Learn more. Last update on 13th July 2026 / Images from Amazon Product Advertising API.
Notable Insights
- Use a heavy-gauge metal file designed for dogs to effectively smooth tough nail edges after clipping.
- File each nail with 10–15 smooth strokes in one direction to prevent raggedness and reduce split risks.
- For light-colored nails, stop filing at least 2 mm before the visible pink quick or grayish oval.
- With black nails, file in small increments and watch for a grayish center indicating proximity to the quick.
- Take short breaks during filing to prevent heat buildup, especially when using a grinder, and cool nails if needed.
Why Smooth Dog Nails After Trimming
While trimming your dog’s nails keeps them at a manageable length, skipping the filing step can leave sharp edges that cause more problems than you might think. Those rough edges aren’t just annoying-they can snag on carpets or furniture, leading to painful splits or even avulsions. You’re also more likely to get scratched during cuddle time. Filing your dog’s nails smooths these jagged points, helping prevent discomfort when your pup stands or walks. Using a nail file or grinder creates a safer, smoother surface that supports proper weight distribution. It also reduces micro-fractures in the nail wall, which can harbor bacteria and lead to infections. Consistent filing after each trim isn’t just about neatness-it’s a key step to maintain long-term paw health. Smooth, well-maintained nails mean happier steps and healthier paws.
Choose the Right File for Your Dog’s Nails
When picking a file for your dog’s nails, go straight for a heavy-gauge metal nail file made specifically for dogs, since their nails are made of tougher keratin than human nails and need a durable tool that won’t bend or overheat. Use a file designed for pets, not standard human files, which wear down fast and can’t handle repeated contact with hard surfaces. A good nail file smooths sharp edges after clipping, especially useful when dog’s nails clicking on floors signals they’re too long. If you accidentally nick the quick during nail trimming, keep a small amount of styptic on hand. Always support the paw gently to keep your dog calm. Pair filing with treats to build trust.
| Feature | Recommendation |
|---|---|
| Material | Heavy-gauge metal |
| Use | Post dog nail clippers |
| Nail Type | All, especially black |
| Strokes per nail | 10–15, one direction |
How to File Dog Nails Without Hitting the Quick
Since the quick can be tricky to avoid, especially in dogs with dark nails, filing your dog’s nails carefully with a heavy-gauge metal file gives you more control than clipping alone, letting you gradually shape each nail while staying safe. When trimming, use a file or grinder with 10–15 smooth strokes per nail, filing in one direction until the tip is flush with the paw pad. For light-colored dog nails, stop at least 2 mm before the pinkish quick or visible grayish oval-this helps avoid cutting too close. With black nails, go at your dog’s pace and trim only 1–2 mm at a time; use caution if a grayish center appears, as that means you’re near the hidden quick. Use a regular nail file weekly to encourage the quick to recede over time, making it easier to trim your dog’s nails safely. Always find nail edges gently, and never rush-patience prevents pain.
Prevent Overheating When Filing Dog Nails
Filing your dog’s nails keeps them smooth and safe, but keeping the heat down is just as important as the cut. To prevent overheating, use short 2–3 second grinding intervals and take regular breaks, especially during extended filing sessions. Overheating risks include pain and damage to sensitive tissue, so nail bed protection is essential. Always test the grinder temperature on the back of your hand before resuming. If it’s warm, stop and cool the tool completely. You can also gently apply a cool damp cloth to the nail tip post-grinding to dissipate heat. Monitoring grinder temperature helps maintain control and comfort. Don’t rush-consistent grinding intervals and attention to tool heat guarantee safer, more effective filing dog nails. Letting the grinder rest protects both your dog and the tool’s motor.
File Black Nails Safely and Confidently
Black dog nails pose a unique challenge because the quick isn’t visible, but you can still file black nails safely with the right approach and tools. Look for a grayish oval in the nail’s cut surface-this signals you’re nearing the quick. Use a heavy-gauge metal nail file or a battery-powered grinder, applying light pressure in one direction for 10–15 strokes per nail to avoid heat buildup. Filing in one direction also prevents ragged edges and smooths each nail flush with the paw pad. With regular filing every week, the quick recede over time, making each session easier. Always keep styptic powder nearby to stop bleeding quickly if you go too far. Consistent, careful filing with the right tools means you’ll gain confidence and keep your dog comfortable. Practice, patience, and the right technique turn a tricky task into routine care-safer for both you and your dog.
Make Filing Dog Nails a Calm, Positive Habit
When your dog’s relaxed and leaning into your side during a quiet moment, that’s the perfect time to start shaping nail care into a calm, positive habit. Start Small by simply touching your dog’s paws and rewarding with treats and praise. Gradually acclimate your dog to filing dog nails by handling one paw at a time, using a heavy-gauge metal file with 10–15 smooth strokes per nail. Make nail trims less stressful by limiting sessions to 1–2 nails if your dog shows stress cues like yawning or side eye. File weekly to keep dog nails regularly maintained, helping the quick recede over time. Always reward your dog immediately after, reinforcing that paws touched leads to positive outcomes. With consistency, filing becomes routine, calm, and pain-free-no force, just patience and praise.
On a final note
You’ve trimmed the nails, now smooth sharp edges with a 180/240-grit file or rotary tool on low speed, always filing in one direction to avoid heat buildup. Avoid the quick by focusing on tips and sides, especially in black nails-file in short bursts, checking often. Testers prefer Dremel 7760-P4 with guard for control, noting less stress and smoother results. Keep sessions calm, reward often, and file weekly to maintain healthy length and prevent splits.