Best Way to Cut Black Dog Nails
Use clippers with LED lighting and a 2x magnifier to see inside black dog nails, trimming just 1–2 millimeters at a time. Watch for the dark warning dot on the cut surface-stop if it grows or turns pinkish. Sharp stainless steel blades prevent splintering, while styptic powder stops bleeding fast if you nick the quick. Keep sessions calm, especially with a tired dog, and you’ll master safe, stress-free trims in no time.
We are supported by our audience. When you purchase through links on our site, we may earn an affiliate commission, at no extra cost for you. Learn more. Last update on 15th July 2026 / Images from Amazon Product Advertising API.
Notable Insights
- Use LED-lit or magnifying clippers to spot the hidden quick in black dog nails.
- Trim nails incrementally, cutting just 1–2 millimeters at a time to avoid the quick.
- Look for the dark warning dot on the nail’s cut surface-stop if it enlarges or turns pink.
- Turn the paw upside down to check for a dark line indicating the quick’s path.
- Have styptic powder ready to quickly stop bleeding if the quick is accidentally cut.
Trim Black Dog Nails Safely
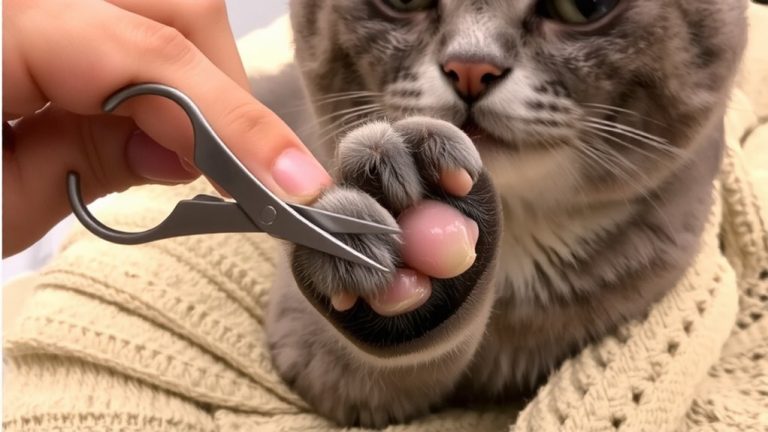
While trimming black dog nails can be tricky because the quick isn’t visible, you can do it safely with the right technique and tools. When cutting black nails, work in a well-lit area and use clippers with a built-in light or magnifier to better see internal structures. Turn your dog’s foot upside down to check the nail’s underside-look for a dark line running through the center, which shows the quick’s path. Clip black nails in small, incremental cuts, about 1/16 inch at a time, and pause after each snip. Examine the freshly cut surface: if you see a small dark dot in the center, stop immediately-it means you’re close to the quick. Never cut into the black center of the nail where the quick lies. Always keep styptic powder nearby, just in case.
Use Clippers That Reveal the Quick
You’ve already taken steps to trim your dog’s black nails safely by using good lighting and checking the underside for the dark line of the quick, but your success depends heavily on the right tools. Illuminated clippers shine a small LED light through the nail, making internal structures visible so you can spot the quick before cutting too close. Pair that with a magnified view, and you get enhanced clarity to detect subtle changes in the nail’s center. These features enable precision cutting, giving you control to snip just enough without causing pain or bleeding. Look for sharp, professional-grade blades-like those recommended by Dr. White at Bwoods Veterinary Hospital-that deliver clean cuts and reduce nail splintering. Testers report fewer mistakes and better confidence when using clippers that combine bright lighting, a 2x magnifier, and stainless steel blades. Clear post-cut visibility means you can stop just in time.
Look for the Warning Dot in the Nail
Think of the warning dot as your compass when trimming black dog nails-this small, dark circle in the center of the nail’s cut surface signals you’re nearing the quick. After each snip, inspect the flat edge of the nail; if you spot a dark center, you’re getting close. This warning dot is your key visual cue, especially since black nails hide the quick. If the dot grows larger or turns pinkish, stop right away-that means the blood vessel is near, and going further will cause bleeding. Many pet owners find success using this method with precision clippers, making just a few millimeters of progress each time. The warning dot gradually shrinks with safe trims, giving you real-time feedback. It’s a reliable, visual cue that keeps the process accurate and stress-free for both you and your dog. Watch it closely and trim carefully to stay in control.
Trim in Small Cuts to Avoid Bleeding
Start with tiny snips-just 1 to 2 millimeters at a time-especially when dealing with black nails that hide the quick. Trimming in small cuts helps you adapt to your dog’s unique nail texture and growth patterns, reducing the chance of going too deep. Even if you can’t see the quick, these incremental trims let you monitor changes in the nail’s core safely. Use sharp, high-quality clippers with built-in lighting or magnification to improve visibility under less-than-ideal lighting conditions. After each cut, check the nail surface for a dark center dot-your signal to stop. Repeated small trims are smarter and safer than aggressive cuts, especially since black nails mask progress. This method gives you control, respects your dog’s comfort, and aligns with vet-recommended practices. Consistent, careful trimming every few days adjusts the quick over time, making future sessions easier and safer.
Stop Bleeding If You Cut the Quick
If you accidentally cut into the quick and see bleeding, don’t panic-act quickly with styptic powder, which most groomers and vets keep on hand because it clots blood in 1–2 minutes when pressed firmly onto the nail tip. If you don’t have styptic powder, natural remedies like cornstarch or a bar of soap work well when applied with steady pressure. Use pressure techniques: press the substance onto the nail for at least 30 seconds without peeking to let the clot form. Avoid cauterizing tools unless you’re trained-they can cause tissue damage. If bleeding continues past 10 minutes despite your efforts, call your vet right away. Keep your dog quiet afterward to prevent reopening the wound. Most dogs tolerate the process well once the bleeding stops, and with the right technique, you’ll handle it confidently next time.
Keep Your Dog Calm During Trims
A calm dog makes for a safer, smoother nail trim-and you can set that tone early with the right approach. Start with early introduction, handling your pup’s paws daily and touching clippers to their toes without cutting. This builds trust and reduces fear. Use positive reinforcement: reward each trimmed nail with a high-value treat like boiled chicken, right after the snip. For wiggly dogs, a grooming restraint towel wraps snugly, limiting movement and easing anxiety. Schedule trims after walks when your dog’s naturally relaxed. Consistency matters-desensitize for one week before the first cut. You’ll see better results and less stress.
| Feeling | Solution |
|---|---|
| Fear | Early introduction to tools |
| Excitement | Grooming restraint towel |
| Stress | Trim after exercise |
| Trust | Positive reinforcement with treats |
On a final note
Keep your black dog’s nails short every 3–4 weeks using clippers with a built-in quick light, like the Boshel LED Nail Clipper, which clearly reveals the blood vessel. Trim just one small sliver at a time, checking for the dark dot in the nail’s center. If you nick the quick, apply styptic powder immediately. Stay calm, reward gently, and work with your dog’s pace to build trust and avoid stress.